Perimeter Gaps and Transition Details in Click-Lock Flooring Projects
Insights & Updates / Project Detailing
Perimeter Gaps and Transition Details in Click-Lock Flooring Projects
A practical coordination guide to the edges, thresholds and junctions that decide how a floating floor behaves after the last plank is fitted.
A floating click-lock floor sits as one continuous field, and its edges are where that field meets walls, door frames, columns, other floor coverings and built-in furniture. Most post-handover problems start there: a board tight against a wall, a threshold trim bridging two floors as one rigid piece, or a fitted unit anchored through a floor expected to move. These are detailing decisions, not product defects. The correct gap value depends on the confirmed product, its installation instructions, the drawings, local requirements and site conditions. What can be standardised is the process: decide early, mark it, agree it with every trade, and verify it before handover.
1. Why the Perimeter Is a Design Decision, Not a Finishing Task
Perimeter detailing is often left to the installer on the day, resolved with a spacer and a length of skirting. That is a risky division of responsibility. The allowance affects setting out, the first and last rows, the width of cut boards and the trim visible at handover; decide it late and planks may already be cut too short. There is a visual cost too: a narrow cut row along a long wall reads as an afterthought, especially with pale, low-contrast boards. Discuss the perimeter alongside laying direction so border cuts balance on opposite sides of the room. Treating it as part of setting out, not a finishing operation, avoids complaints at the end of a project.
2. Mark Every Fixed Edge on the Drawings Before Ordering
Before quantities are fixed, identify every obstruction the floor will meet: walls, door frames, columns, pipe penetrations, glazed partitions, desks, fixed cabinetry and stair bases. Each needs a decision on whether the floor runs up to it with a gap, stops at a trim, or terminates at a joint. Mark these on one coordinated drawing and reconcile it with joinery and services drawings. A column cladding installed after the floor, or a glass channel fixed through it, changes what the flooring contractor can do. Resolving the interfaces before materials are ordered is cheaper than discovering them when the last rows are cut, and gives the supplier a clear basis for trim profiles.
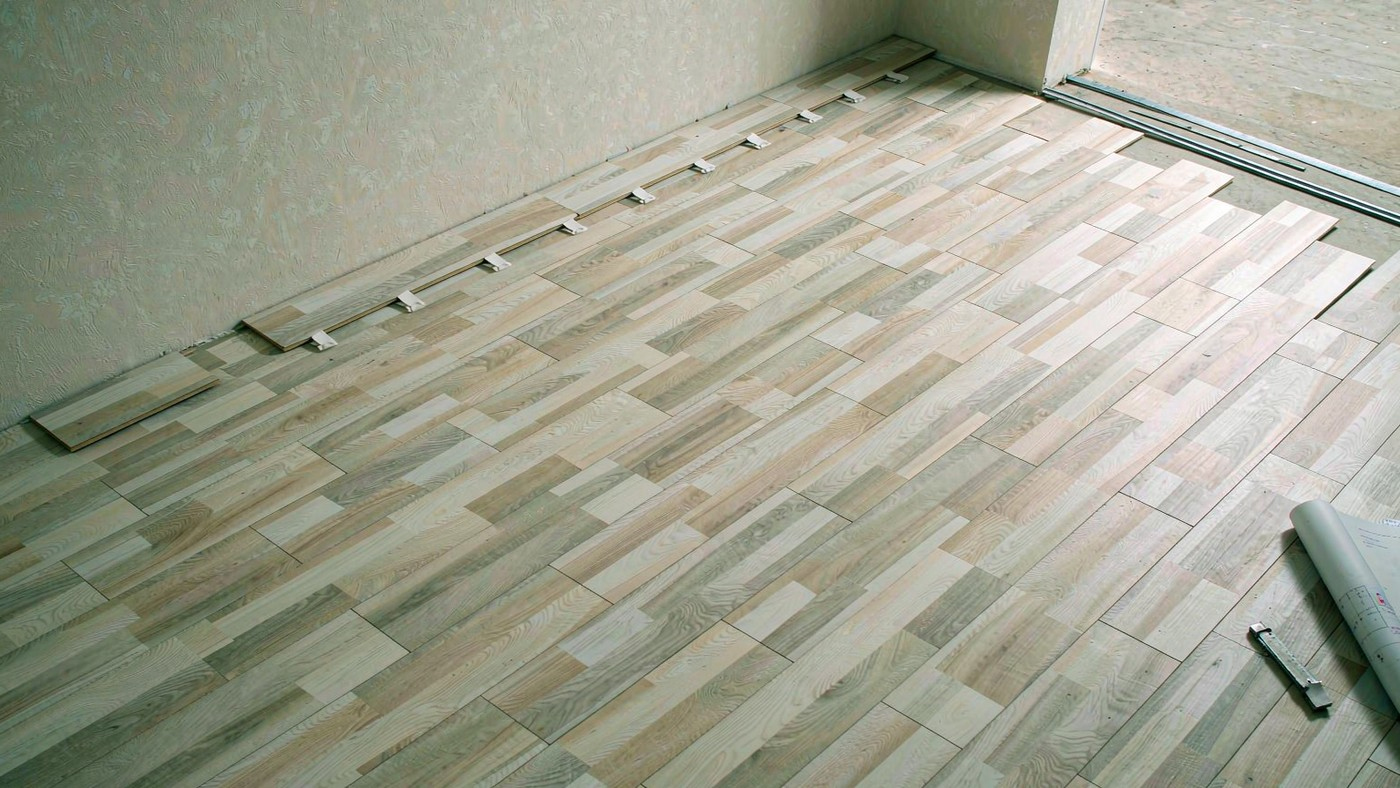
AI-generated concept visual. Not a photograph of a real installation.
3. Agreeing the Gap Without Quoting a Universal Number
Publishing one gap figure and applying it everywhere ignores that the allowance depends on the product construction, field size and shape, range of site conditions and the requirements applying locally. A small room and a long, sunlit corridor are not the same problem, even with the same plank. Obtain the installation instructions for the confirmed product, check what the manufacturer states, and have the specifier record the agreed value on the drawing with its source. Where site conditions suggest a different figure, raise it as a written query and resolve it before installation starts. Keep the answer in the submittal file for later phases and future repairs, and use consistent spacers across the whole field.
4. Doorways, Thresholds and Changes of Floor Covering
Doorways concentrate several decisions in a narrow strip: where the field stops, whether a joint is needed, which trim covers the edge, and how a change of material or level is handled. Where two coverings meet, agree which contractor terminates which material, who supplies the profile and in what sequence; a catalogue profile can be unusable if it must be fixed through the floating field. Finished floor height and door undercuts belong to the same conversation but are a separate coordination item, resolved against the finally approved build-up rather than a concept image. Confirm the trim with a sample and check that door leaves and accessibility requirements still work.
5. Columns, Pipes, Built-In Furniture and Other Penetrations
Any fixed object passing through or sitting on the floor can restrain the field. Columns and pipes need a clean cut with an allowance around the penetration, covered by a collar that does not bear on the boards. A reception desk or fixed cabinet anchored through the flooring may prevent the movement the instructions assume. Decide whether such items are installed before the floor, after it with independent fixing, or where the floor is divided. Keep a short schedule of penetrations and fixed items with a decision against each, and put the agreed treatment in the site instruction pack.
6. Dividing Larger Fields: Where Movement Joints Belong
Large areas, long corridors, changes in room shape and narrow connections raise the question of where the floor should be divided. A movement joint affects setting out, plank orientation on either side, the covering trim, and how the line aligns with doorways and ceiling features; decide it during installation and the trim usually ends up somewhere awkward. Put proposed positions on the setting-out drawing and review them with the designer, who may prefer alignment with a structural or partition line. Check the confirmed product's instructions on continuous field dimensions and joints at doorways. On phased projects, record the positions so later phases continue the same logic.
7. Trade Coordination and the Sequence of Works
Perimeter details fail as often through sequencing as through design. Skirting, glazing channels, joinery, painting and final-fix services all interact with the floor edge: skirting fixed before the floor may set the wrong line, while trims fixed too early may cover an uninspected gap. Agree a short written sequence: subfloor sign-off, setting out, spacer placement, final row, inspection of gaps before trims, then trims and protection. Make one person responsible for confirming the gaps immediately before trims are installed, and record the check with dated photographs. That protects everyone when several subcontractors share the area.
8. A Pre-Handover Check of Gaps and Trims
The last inspection should be short, systematic and done before protection is removed. Walk each room and check the whole perimeter, not just the easy sections: behind fitted furniture, inside door recesses, at column bases and where the floor meets another covering. Confirm spacers are removed where required, trims are fixed as agreed without pressing on the boards, cut edges are covered and no gap is filled with a rigid material. Record exceptions against the annotated drawing, not a general note. Add the agreed gap value, trim details, joint positions and dated photographs to the handover pack with the product identification and installation instructions for future repairs or later phases.
Perimeter detailing checklist for the project file
• One coordinated drawing marking every wall, doorway, column, penetration and fixed item.
• The agreed perimeter allowance, its source in the confirmed installation instructions, and its approval date.
• Threshold details for each repeated door or material change, with an agreed sample profile.
• A written work sequence covering spacers, gap inspection, trims and protection.
• Dated photographs of gaps before trims, plus exceptions located on the drawing at handover.
In Summary
Perimeter gaps and transition details are small items on a drawing and large items in a completed building. Their values come from the confirmed product, the drawings and the site, so no number in an article should replace those documents. What a team controls is discipline: decide early, record in one place, coordinate with every trade touching the floor edge, inspect before trims, and keep the information for whoever maintains the floor later. For buyers, ask what installation documentation and trim options accompany the confirmed product.
Coordinating a click-lock flooring project?
Share your drawings, room schedule and threshold conditions with our team. We can help identify which parameters need confirming against approved product data before installation.
Wenzhou Qinsi New Materials Co., Ltd. - Xinjue Flooring. Small-batch, made-to-drawing customisation and OEM enquiries are discussed case by case, subject to feasibility and commercial terms.
General information and image notice
This article provides general coordination guidance and describes no company event, award, partnership or customer project. It states no regulation, certification, test result or fixed technical value. Perimeter allowances, joint positions, trim profiles and sequences must be confirmed for each project against the finally approved product, its installation instructions, the drawings, applicable local requirements and site conditions. The image is an AI-generated concept visual, not a factory photograph or real installation record.
www.qinsiflooring.com
Wenzhou Qinsi New Materials Co., Ltd.
About Author